Your cart is empty


How to Choose the Right Ratchet for Your Beyblade Playstyle
Why the Ratchet Matters
In the competitive world of Beyblade battles, every component matters, but the Ratchet is one of the most underappreciated yet influential parts of a Beyblade top. Positioned between the Blade and the Bit, the Ratchet plays a pivotal role in determining your Bey's spin direction, burst resistance, and even performance height.
Whether you're an aggressive attacker or a balanced defender, choosing the right Ratchet can give you the edge needed to dominate the stadium. Understanding the nuances of this component is essential for mastering the modern Beyblade X and CX systems.
What Is a Ratchet in Beyblade?
A Ratchet is a mechanical part located between the Blade and the Bit in Beyblade X and CX systems. It serves as the connecting axis that holds the upper and lower parts together. More importantly, it controls three key performance factors: the direction of spin, the level of burst resistance, and the vertical height of your Beyblade top.

The Ratchet is more than just a mechanical bridge. It is an adjustable tool for strategy, allowing Bladers to fine-tune their build to suit specific battle conditions. As Beyblade technology continues to evolve, Ratchets are becoming increasingly significant in influencing match outcomes.
Understanding Spin Direction: Left vs. Right
Most Ratchets in the CX series feature a dual-spin design. This allows Bladers to manually toggle between left-spin and right-spin by twisting the outer ring of the Ratchet. These directions are clearly marked as "L" for left and "R" for right.
Right-spin configurations are the traditional setup for many Beyblade tops. They provide more consistent performance in the stadium and tend to be more stable in battles against left-spin tops. Left-spin, on the other hand, is used strategically to counter right-spin opponents. Left-spin Beyblades tend to produce unpredictable movements, which can throw off the rhythm of right-spinning opponents.

Mastering spin direction is a critical part of modern competitive Beyblading, especially when using customizable components like those in the Beyblade CX system.
Burst Resistance: How Ratchets Affect Battle Endurance
Burst resistance determines how well your Beyblade holds together during intense combat. A tightly constructed Ratchet increases resistance to separation, reducing the chances of a burst finish. This is particularly important in long-form battles where endurance plays a major role.
A tight Ratchet offers more structural integrity, making it ideal for defensive or balance-type Beyblades. On the flip side, a looser Ratchet setup may allow for faster rotations and dynamic strikes, which is preferable for attack-type Beyblades. However, this trade-off can increase the risk of bursting upon impact.
The synergy between Ratchet tightness, Bit design, and Blade type determines the overall resilience of the Beyblade. Strategically choosing your Ratchet based on burst resistance can be the difference between victory and defeat.
Ratchet Height and Its Impact
Height configuration affects a Beyblade's center of gravity, contact point alignment, and stability during combat. Ratchets are labeled with a height indicator, such as "6-60," where the second number refers to the height in tenths of a millimeter.
Low-height Ratchets place the Beyblade closer to the stadium floor, resulting in a lower center of gravity. This increases balance and stamina, making it difficult for opponents to knock the top off balance. It also reduces the chances of recoil.
Higher Ratchets lift the Blade higher above the stadium floor. This allows for overhead strikes and better leverage in attack-type builds. However, a higher build may become unstable during high-impact collisions.
Understanding height dynamics is vital when designing Beyblade builds tailored to your playstyle, particularly in tournaments using the Xtreme Stadium or similar competitive settings.
Types of Ratchets and Their Use Cases
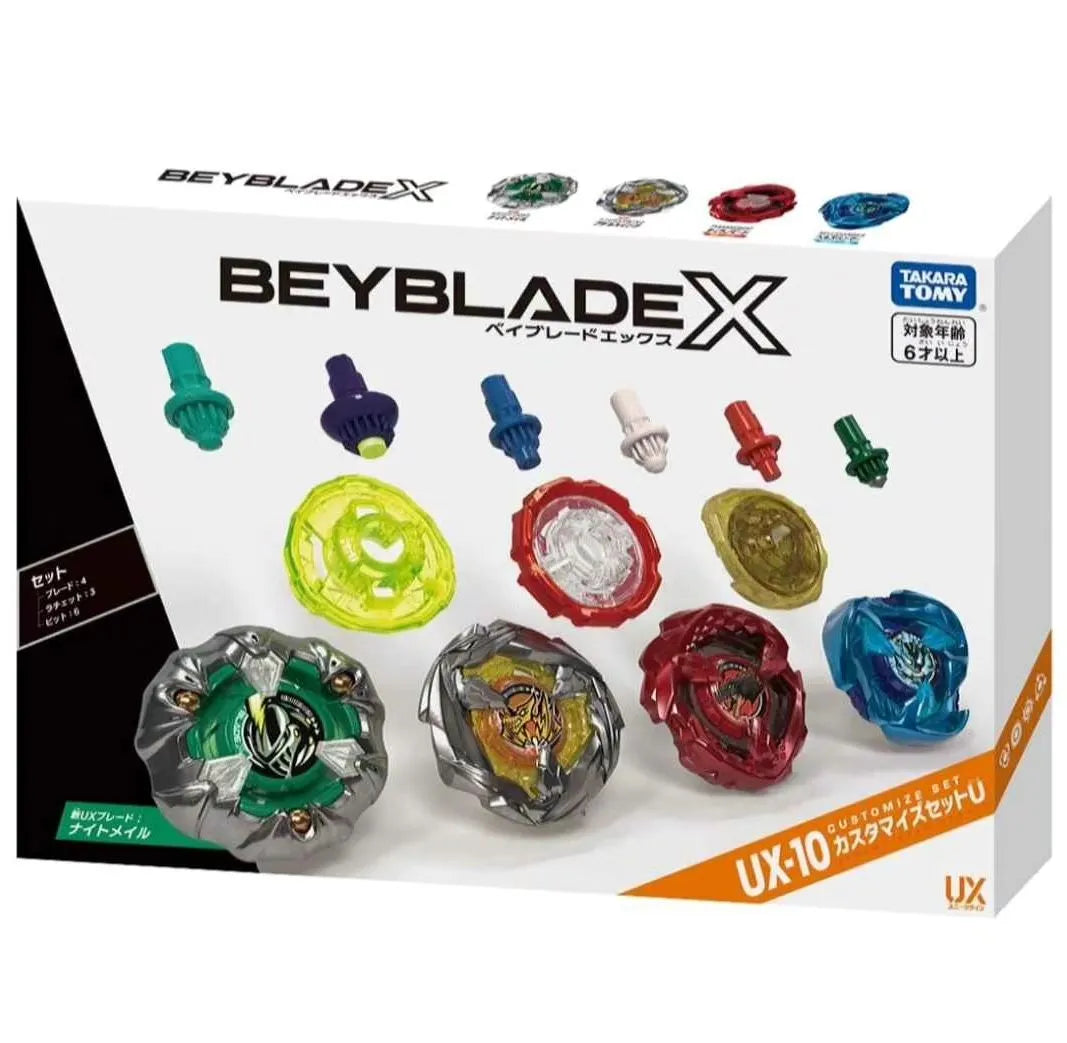
6-60 Ratchet
The 6-60 Ratchet features a mid-height build and dual-spin compatibility, making it one of the most balanced options available. It is ideal for stamina or balanced builds where stability and sustained spinning are essential. This Ratchet serves as a reliable starting point for new players and seasoned Bladers alike.

3-60 Ratchet
Slightly lighter than the 6-60, the 3-60 Ratchet caters to attack-based strategies. Its reduced weight enables quick bursts of speed and agile movement across the stadium. Pairing it with aggressive Bits and sharp-edged Blades can maximize offensive potential.

4-80 Ratchet
The 4-80 Ratchet is designed for maximum aggression. With a taller height and a high center of gravity it enables overhead strikes and high-impact attacks. However, it demands precise control and weight balancing to avoid destabilization.

5-70 Ratchet
The 5-70 Ratchet offers a moderate height and enhanced burst resistance. It is especially effective in defense-based configurations. The extra resistance ensures structural integrity during repeated impacts, giving defenders a tactical edge.

3-70 Ratchet
The 3-70 Ratchet provides a well-rounded performance suitable for balance-type builds. It maintains a stable height and offers enough burst resistance to withstand both offensive and defensive encounters. Ideal for players looking for versatility in their loadout.

Each Ratchet introduces unique dynamics that can transform your Beyblade's behavior. Choosing the correct type depends on your overall strategy and the type of opponents you regularly face.
Matching Ratchets to Your Playstyle
If your strategy revolves around high-speed attacks and explosive movement, you should consider the 4-80 or 3-60 Ratchets. These Ratchets raise the Blade and reduce floor friction, allowing for aggressive movement patterns. They pair well with Rubber Bits and sharp-edged Main Blades to create a truly offensive build.
For defensive playstyles, the 5-70 and 6-60 Ratchets are the most reliable. They increase burst resistance and provide a lower, more stable platform. Combining these Ratchets with Metal Bits and Assist Blades that minimize recoil can make your Beyblade exceptionally hard to burst.
Stamina-focused Bladers should consider the 3-70 or 6-60 Ratchets. Their lower height reduces energy loss due to wobbling and keeps the Beyblade spinning longer. They are best paired with Disk Bits or Free Bits to enhance rotational endurance.
Balance-type players can benefit from the 3-70 Ratchet, which offers both control and resilience. It works well with Trans Bits and dual-purpose Blades, making it a go-to choice for adaptable Bladers who adjust tactics mid-battle.
Conclusion: Your Ratchet, Your Strategy
The Ratchet is not just a mechanical component, it is a tactical choice that directly influences your Beyblade’s behavior and outcome in battle. From spin direction and height to burst resistance and performance synergy, choosing the right Ratchet is essential for any serious Blader.
By understanding the characteristics of each Ratchet type and matching it to your playstyle, you can craft a Beyblade that performs optimally in any stadium environment. Explore the full range of CX-compatible Ratchets today at MallOfToys and start winning battles with precision, power, and personalization.
- Choosing a selection results in a full page refresh.